

Statement Window
Individual statements for patients or families can be created from the Account Module.
In the Account Module toolbar, click the Statement dropdown.
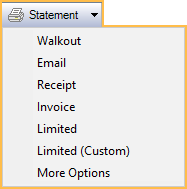
Statement button: Immediately prints to default printer. Prints all transactions within the number of days set in Billing Defaults or, the date range entered in the Account Module, Show tab. Set the default Statement sheet in Sheet Def Defaults.
Walkout: Immediately prints a Walkout Statement which does not include payment options. Displays information (procedures, payments, adjustments, etc) from today's date only, for the selected patient.
Email: Generates PDF attached to an email. The subject and body are automatically filled in based on Billing Defaults, but can be edited before sending. Regular email is not a secure method of sending statements (PHI).
Receipt: Immediately prints Receipt with today's payments. Set the default Receipt sheet in Sheet Def Defaults.
Invoice: Shows Invoice with selected procedures, usually for foreign countries. Set the default Invoice sheet in Sheet Def Defaults.
Limited: Shows transactions associated with selected procedures, pay plan debits, patient payments, insurance payments, and adjustments. See Limited Statement for details. Set the default Limited sheet in Sheet Def Defaults.
Limited (Custom): Displays the Limited Statement Select window. See Limited Statement for details.
More Options: Shows the window below to let users customize a statement prior to printing or sending.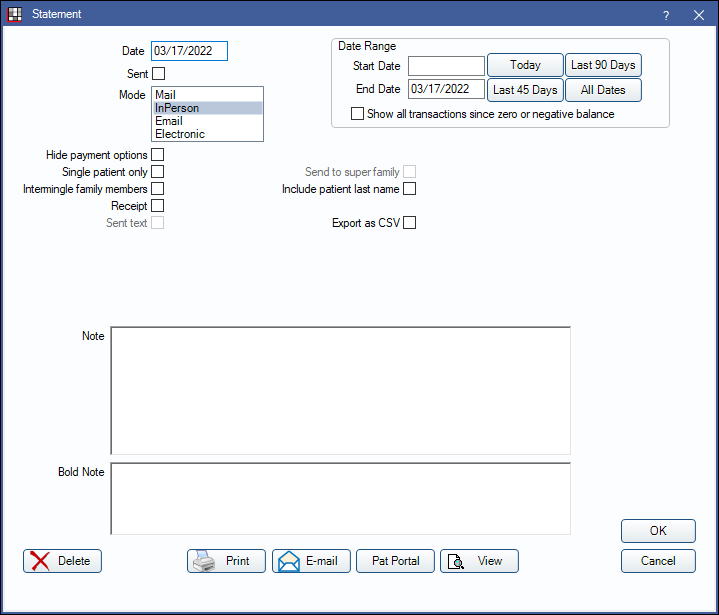
Alternatively, this window also opens when a user double-clicks a bill or clicks Edit Selected from the Bills List (Billing List). A read-only window also opens when a user double-clicks an existing statement, invoice, or receipt.
Below is a description of all options that might show on the window. Not all options show for all statement types, and not all options can be modified.
- Date: Defaults to today's date.
- Sent: Automatically checked once the statement, invoice, or receipt is printed or emailed. It can also be changed manually.
- Mode: The method of delivery.
- Hide payment options: Remove payment information (amount due, date due, amount enclosed, and credit card payment section, aging).
- Single patient only: If checked, only the selected patient's procedures are included. If unchecked, procedures for all family members are included.
- Intermingle family members: If checked, all patients in the family are mixed in one grid. If unchecked, each family member has their own grid. Set the default in Preferences, Account Module statements default to intermingled mode.
- Receipt: Create a Receipt instead of a statement. Receipts only include patient payment information.
- Send Text Message: Send a text message to the patient about this statement. Only works when sending statements from the Billing List. Set the default text message in Billing Defaults, SMS Statements. The message can include a clickable URL to access an online version of the statement. See Online Payment.
- Send to Super Family: Only an option if the patient is a member of Super Family and the family guarantor has Included in Super Family Billing checked on the Edit Patient Information. If checked, a super statement that includes account activity for all super family members will be generated. Super statements always group by super family guarantor.
- Include Patient Last Name: Include patient's last name in Patient column of the statement.
- Export as CSV: Export the statement as a CSV once it is printed or emailed from the Statement window. Users must have the Export CSV Permission to use this option.
- Files are saved to the Image Category marked for Statements once the user clicks OK. If no category is marked for statements, the file is saved to the RoyalDentImages folder for the patient.
- CSV does not include payment plan summaries or aging categories.
- When creating a limited statement or invoice, the CSV will include procedure, insurance estimate, and account totals for the entire family (or super family).
- If the statement is not also printed, emailed, or sent to Patient Portal it will remain noted as Unsent. Check the Sent checkbox to mark the statement as sent.
- Limited Statement: Indicates the statement is a limited statement. Only shows for limited statements.
- Invoice: Indicates an invoice. Only shows for invoices. An invoice number will also show.
- Date Range: Transactions that fall between the start and end date will show on a statement. Type the dates, or click one of the buttons to insert a date. If either of the dates are blank, it's the same as not putting a limit on the date range. So if both dates are blank, then all account transactions will show. Date range is ignored if Only show transactions since last zero balance is checked.
- Show all transactions since zero or negative balance: If checked, all transactions from the last date the family account balance was zero, or had a credit balance, will print on the statement. The date range entered will be ignored.
- Notes: General notes.
- Bold Note: Shows in bold red above and below the family grid. When printing individual statements, there is no way to set a default note or dunning messages. But if Quick Paste Notes (Quick Paste Notes Setup) are set up properly, users can fill in a variety of notes in this box using only 2 keystrokes each (? + single letter abbreviation). Default notes and dunning messages can be set as part of the batch billing process.
Buttons at Bottom
Delete: Deletes Statement. If current user does not have the Image DeletePermission, any copy saved in Image Folder will not be deleted.
Print: Sends to the default printer. The statement is designed to be printed on standard perforated billing paper and to fit inside a standard window envelope.
If the statement is marked as sent, this button will open the statement in PDF.
Email: Open the Email window, with a PDF version of the statement, receipt, or invoice attached. The default email message will be used.
Pat Portal: Send the statement to the patient's portal. In order to do so, the following criteria must be met:
- The patient portal must be set up. See Patient Portal.
- The patient must have access to the patient portal. See Patient Portal Access.
- In Definitions: Image Categories, the Statements category must have Show in Patient Portal and Statements selected.
If criteria is met, a message will give users an option to notify the patient via email that the statement is available:
- Click No to send the statement to the portal without sending a notification email.
- Click Yes to open the Edit Email Message window with a default message notifying the patient about the statement availability and how to access it.
View: Preview the statement, receipt, or invoice. Clicking view will open the Fill Sheet window for additional options. Edit any custom Sheet Field Types then Print or Email to save the changes.
- Print: Sends to the default printer. When printed, the Fill Sheet window will close and the Sent box will be checked in the Statement window. Click OK to save. Click Cancel to mark the statement as unsent.
- Email: Opens the Email window, with a PDF version of the statement, receipt, or invoice attached. The statement sheet name will be used as the email subject. Insert an E-mail Template or create a custom message.
- Close: Closes the Fill Sheet window without saving changes to the sheet elements.