

Billing List
In Billing, at the bottom, click Create List.
Statements generated via the billing list can be printed, sent to an electronic billing processing service, or emailed directly from Royal dental Software.
In the Billing Options window, set your filters, then click Create List. All guarantors that meet the billing option criteria will list.
Sort and Filter
Sort and filter the billing list using the options at the top.

- Unsent / Sent: Toggle the list to view sent or unsent statements.
- Order by: Sort statements by billing type or patient name.
- Email From: The email address statements are sent from. If using Clinics and Practice/Clinic is selected, the email address of the patient's clinic is used. If there is no clinic email, the practice default is used.
- Clinic: Only show guarantors assigned to the selected Clinic.
- Start / End Date: Filter by date range.
- For unsent statements, filter the list by the date the statement was generated.
- For sent statements, filter the list by the date the statement was sent.
Click Refresh to update results.
Bills Grid
The Bills Grid displays the billing list.

Double-click a statement to view the Statement Window.
Right-click on a row and click Go To to select the patient's account. The bills will show as unsent statements in individual accounts. The billing list window will remain open.
Columns:
- Name: Guarantor's name.
- Bill Type: The Guarantor's Billing Type.
- Mode: The method the statement will be sent. Mode options include:
- Email: To securely email statements, see Billing Defaults. Regular email is not a secure method of sending statements (PHI). Note: Email is a patient's default mode when their billing type is an email billing type (in Definitions: Billing Types, E has been entered for E = Email bill). The statement will be attached to the email as a PDF (Adobe Acrobat) and the default email message will be used. If a patient's email address is missing, that bill will be skipped and a notification will appear.
- Mail: The default mode for all non-email billing types (when electronic billing is turned off). These statements will be generated as one PDF file and previewed on-screen, sorted by clinic in alphabetical order by patient last name. Printed statements are designed to be printed on standard perforated billing paper and to fit inside a standard window envelope.
- Electronic: The default mode for all non-email billing types when electronic billing is turned on. These statements will be sent to the electronic billing processing service. Limited statements, receipts, and invoices cannot be sent electronically.
- InPerson: The mode for unsent statements generated from the Account module. These statements are generated as a PDF file then previewed on-screen.
- Email: To securely email statements, see Billing Defaults. Regular email is not a secure method of sending statements (PHI).
- Last Statement: Date of the last statement sent.
- BalTot: The total family balance.
- -InsEst: Displays an insurance amounts pending for the family.
- =AmtDue: Displays the amount due for the family, after insurance.
- PayPlanDue: Displays the amount due on a payment plan, if any.
Other Options
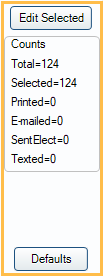
- Edit Selected: Edit several bills at once. Highlight the bills then click the button. Any changes affect all selected bills. CTRL + click a statement to add or remove from the current selection. To edit only a single statement, double-click the statement instead.
- Defaults: Opens limited view of Billing Defaults window in order to modify Electronic Billing credentials (e.g. password/username) without clearing the list of statements.
- All: Select all patients in the list.
- None: Deselect all patients in the list.
- Print List: Print the list of bills (not individual statements).
Send Statements

Send: Click to send statements. Statements will be generated and/or sent based on their Mode.
Close: Close the billing list.
- If statements are unsent when closing the list, the following prompt will dislay:
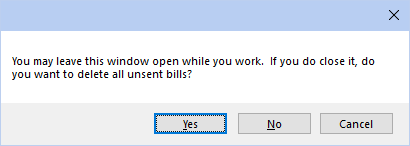
- Click Yes to delete the unsent statements. Statements can be re-generated for patients at a later time. When selected, a confirmation will display with the number of deleted statements.
- Click No to save the list. Return to the billing list at any time to continue.
Once bills are successfully sent or generated, a confirmation message will show and a statement line item will be added to the guarantor's patient account ledger.
If sending electronic billing and the office has opted to generate PDF copies of the statements, statements will generate and save in each patient's Imaging Module, Statement folder.
If a payment is posted to the account after the statement is generated, but before it is sent, aging will be updated but the dunning messages will not. This is typically not an issue if statements are sent immediately.
To send an additional text message to patients when sending statements from the billing list, see Billing Defaults, Send text messages for these modes. The text message can optionally include a clickable URL that launches the Patient Portal Sign in window. See Online Payment Management.
Billing Progress
If the preference, Show progress when sending statements, is enabled, a progress window will display. Offices can also set a Max number of statements per batch. This is useful for large offices that send many batches of statements at once.
Do not open other windows while sending statements. Doing so will cause sending to pause.

- Overall: Indicates percentage of progress towards all sending statements.
- Batch: Indicates percentage of progress towards printing the batches of statements. If using clinics, a separate batch per clinic is processed.
- Statement: Indicates the percentage of progress towards printing individual statements in the batch.
- Progress Log: Displays a real-time log while statements are sending.
- Pause / Resume: Click Pause to stop progress, finish the current statement to PDF, then send the current batch if applicable. Electronic billing statements will not be sent. Click Resume to keep sending statements.
- Cancel: Finish the current batch and close the Billing Statement Progress window. The Bills window locks until the batch is finished. Electronic billing statements will not be sent.
Unsending Bills
If something went wrong during the printing process, bills can be unsent to be reprinted.
- Click the Sent radio button at the top of the Bills window to show all sent bills.
- Highlight all printed bills to unsend, then click Edit Selected.
- Uncheck the Sent box. This setting will apply to all selected bills.
- Click OK to return to the Billing List. Click the Unsent radio button to see all the bills. If the bills are not in the list, ensure the date range is inclusive enough.