

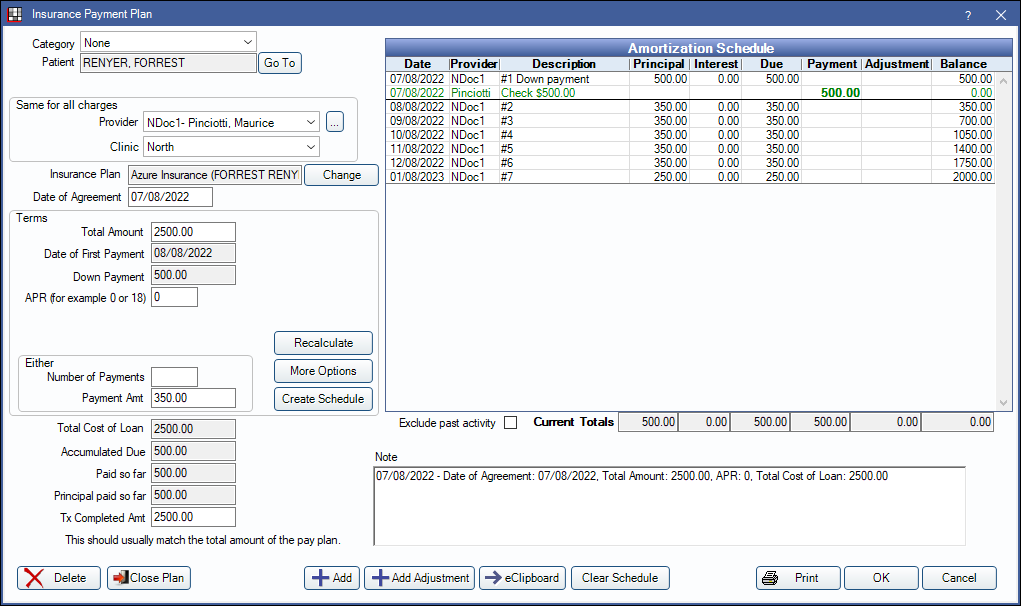
Insurance Payment Plans
Insurance Payment Plans can be used to track expected insurance payments (e.g., insurance installment payments).
In the Account Module Payment Plans grid, they show with a Type Ins.

- The grid can also list regular Payment Plans, Dynamic Payment Plans, and Installment Plans.
- Insurance Payment Plans can only be used in conjunction with Dynamic Payment Plans if using the correct setup. See Dynamic Payment Plans: Setting up a Dynamic Payment Plan for use with an Insurance Payment Plan.
- See General Setup steps at the bottom of this page.
Alternatively, to create a new Insurance Payment Plan, in the Account Module, click Payment Plan, Insurance Payment Plan.
General Agreement Information
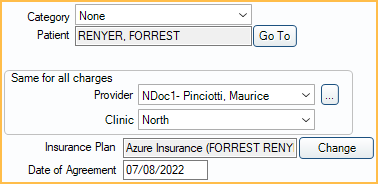
Category: Assign a category to this payment plan (e.g., Ortho, Implant). Useful to distinguish one payment plan from another when families have many plans. Customize category options in Definitions: Payment Plan Categories.
Patient: The person who was treated. Click Go To to switch to their account. Patients can have multiple payment plans, and each plan can have a different guarantor.
Provider: Use the dropdown or click [...] to change the provider assigned to the payment plan.
Clinic: Use the dropdown to change the clinic assigned to the payment plan.
Insurance Plan: Click Change to select the insurance plan this payment plan is attached to, then click OK.
Date of Agreement: Defaults to today's date. This can be changed to a past date.
Terms
Terms affect the Amortization Schedule.
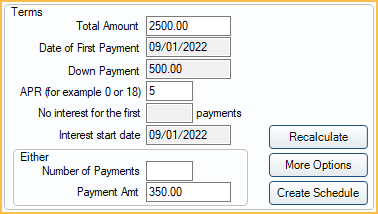
Total Amount: Enter the total amount of expected payments from insurance.
Date of First Payment: Enter the date the first insurance payment is received (e.g., today's date).
Down Payment: Enter the down payment amount. This will be expected due immediately (i.e., Date of Agreement).
APR: Typically APR is not charged on insurance payment plans. If insurance is paying interest, enter the rate here. If an amount other than 0 is entered, the following fields will be available: (only one can be used at a time.)
- No interest for the first # payments: Enter a number to prevent interest from calculating until after those payments (e.g., if 3 is entered, interest will not be calculated until the fourth payment). Does not include the down payment.
- Interest start date: Type a date to prevent interest from being calculated until after the entered date.
Either: To calculate the payments, enter in one of the following:
- Number of Payments: Enter the expected number of payments from insurance.
- Payment Amt: Enter the full expected payment amount from insurance.
Recalculate: Insurance payment plans cannot be recalcuated.
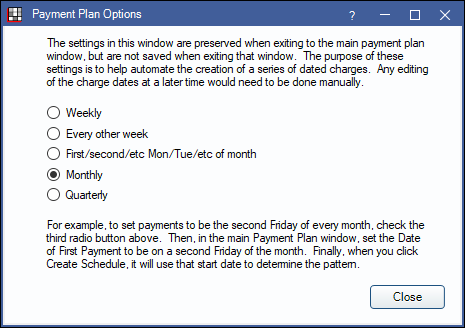
More Options: Click to select the frequency of payments. The default frequency is Monthly.
Create Schedule: Click to create the amortization schedule.
Loan Information
All fields are read-only and auto-calculated except the Tx Completed Amt field.
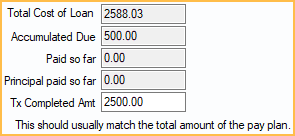
Total Cost of Loan: Total Amount + calculated Interest + Pay Plan Adjustments
Accumulated Due: Total payments due to date.
Paid so far: Total amount paid toward the payment plan to date. Payments must be attached to the payment plan to calculate in the total.
Principal paid so far: Total amount that has been paid towards the principal to date. Payments must be attached to the payment plan to calculate in the total.
Tx Completed Amt: The total amount of all insurance payments. This amount will be subtracted from the patient's account balance.
Amortization Schedule and Note
The amortization schedule is generated based on the terms. Principal and interest are calculated automatically. Due dates are based on the Date of First Payment and the frequency selected from More Options.
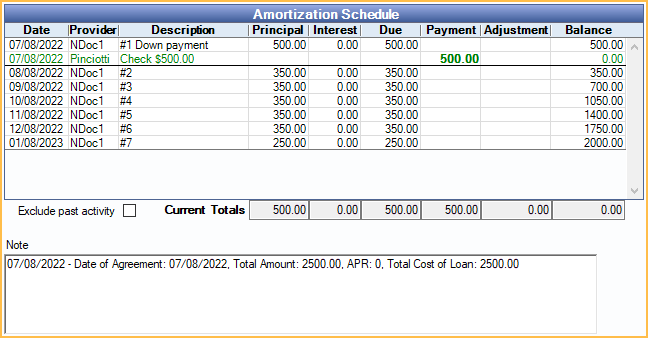
Exclude past activity: When checked, only future dated line items show in the Amortization Schedule and past activity is hidden. When unchecked, all activity shows. Totals are not affected by this setting. To set the default setting for the checkbox, see Preferences, Payment Plans exclude past activity by default.
Current Totals: Automatically calculated based on current and past charges, accumulated payments, and the running balance.
A horizontal bold line indicates today's date and separates past items from future items. Any amount currently due is bold. Payments attached to this plan show in the Payment column and affect the running balance. The provider column will note the last name of the provider assigned to the payment split attached to the payment plan.
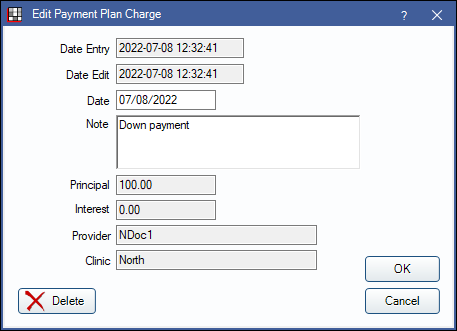
Double-click a row to edit. Only the Date and Note are editable fields for Insurance Payment Plans.
Saving, Adjustments, Closing Plan, and More
Delete: Delete the entire payment plan.
Close Plan: Click to close out the payment plan. Do this once insurance stops making payments (i.e., pays off the claim or is no longer paying). If insurance paid less than was originally anticipated, the user will receive a warning.
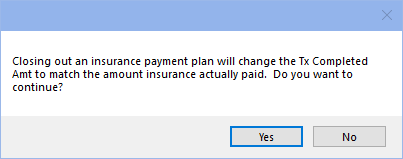
Click Yes to proceed with closing the payment plan. The The Tx Completed Amt will be adjusted to match the Paid so far amount. Click to No to return to to Insurance Payment Plan window without closing the payment plan.
Add: Used to add notes to the Amortization Schedule only.
Add Adjustment: Add a negative payment plan adjustment to discount a portion of the payment plan balance (e.g., for a courtesy discount). The Negative Pay Plan Adjustment window will open. Enter the amount to adjust off the payment plan.
eClipboard: Not used for Insurance Payment Plans.
Clear Schedule Click to clear the existing Amortization schedule.
Print: Click to print the payment plan. See Sign and Print Payment Plan.
OK: Click to close the window and save changes.
Cancel: Click to close the window without saving changes.
General Setup
Setting up an insurance payment plan:
- Create and send the insurance Claim. Each claim can only be associated with one payment plan.
- When the first insurance payment comes in, set up the insurance payment plan before receiving the payment.
- If insurance is making a large first installment payment (this is uncommon) input this as the Down Payment.
- Input the Total Amount.
- Uncommon: Input the APR and interest information.
- Input the Number of Payments or Payment Amt.
- Click More Options and choose the payment frequency.
- Click Create Schedule to create the Amortization Schedule.
- In the Tx Completed Amount field, note the total expected principal payments from insurance (i.e, not including any interest).
- Adding the Tx Completed Amount will ensure that the patient is not responsible for the amount expected to be paid by insurance once the claim is received.
- Receive Claim and Finalize Insurance Payment as normal.
- To receive claim payments, with interest (uncommon), see Interest on Insurance Payments
- As subsequent payments come in, receive them as Supplemental Insurance Payments.
- Once insurance has paid off the payment plan or stops making payments, click Close Plan.
- The user will be prompted to adjust the Tx Completed Amount to the amount actually paid by insurance, so if there was any balance unpaid, this will now be patient responsibility.
If the insurance payment plan was created prior to receiving the first insurance payment, payments will automatically be attached to the insurance payment plan. If the payment plan is created after receiving insurance payments, users must manually mark insurance payments as attached to the payment plan. See Attaching Payments to an Insurance Payment Plan below for more information.
- Run the Insurance Payment Plans Past Due Report to view patients with insurance payment plan amounts past due.
- Due Now column in Payment Plan grid is for patient due amounts and does not apply to Insurance Payments due.
Attaching Payments to an Insurance Payment Plan
Attaching/Detaching Payments to or from Plans: If a user creates the claim payment before the insurance payment plan, the payment will not automatically attach to the payment plan. To manually attach, open the claim payment by double-clicking the procedure to open the Claim Procedures ( claimprocs ) window, then check Attached to Insurance Payment Plan.
To detach a payment from an insurance payment plan, open claim, double-click the procedure to open the Claim Procedure window, then uncheck Attached to Insurance Payment Plan.
Troubleshooting
When entering the insurance payment, it does not automatically attach to the payment plan even though there is a balance on the plan.
- First check that the Tx Completed Amt in the insurance payment plan matches the Total Amount of expected payments.
- If the Tx Completed Amt is 0, you will be unable to attach the payment to the plan.