

Receive Claim
Individual insurance claims can be received through the Account Module.
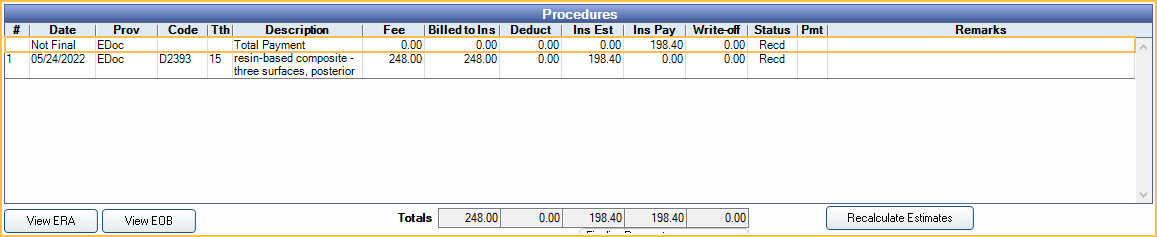
In the Edit Claim window, at the upper-right, is an Enter Payment area.
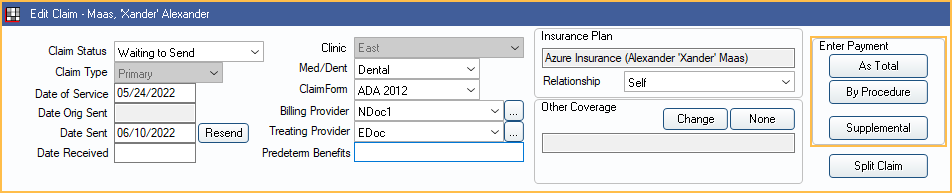
Click one of the three buttons.
- As Total: Enter a total payment amount. See As Total below for details.
- By Procedure (recommended): Itemize the payment by procedure. See By Procedure below for details.
- Supplemental: Add additional payments to procedures already received. See Supplemental Insurance Payments.
When payments have been entered, paid procedures and the claim will change to a status of Received.
When entering payments, it is recommended to include all EOB information, including remarks. This way all information is available in Royal dental Software and accessible from any computer. When a patient has questions, users can quickly determine what was or was not paid and why.
Also see:
 See our Webinar: Claim Payments
- Batch Insurance Payment
- Interest on Insurance Payments
- Incorrect Procedures on Claim
- Claims with No Payment (See below)
- Insurance Pays on Alternate Procedure Codes (See below)
As Total
Entering payments As Total is available for insurance plans with a type of Category Percentage, Medicaid or Flat Co-pay, and Capitation.
Entering an As Total payment differs depending on the Allocations Setup for Claim Pay by Total splits automatically.
When Claim Pay by Total splits automatically is checked:
- Click As Total.
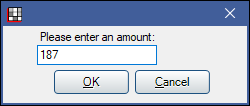
- Enter the total amount paid, then click OK.
- The Enter Payment window will open. Royal dental Software will automatically assign amounts to each procedure. Amounts can be changed if desired, or simply click OK to accept the amounts.
- The paid amounts will show split to each procedure in the Edit Claim window.

- Once complete, continue to Finalize Insurance Payment.
When Claim Pay by Total splits automatically is unchecked:
- Click As Total.
- The Edit Claim Procedure window will open. Enter the full Insurance Paid amount, then click OK.
- The total payment will show as a new line item in the Edit Claim window.
- Once complete, continue to Finalize Insurance Payment.
By Procedure
Entering payments By Procedure is available for all insurance plan types except Capitation. It is required for PPO plans to track write-offs.
- To post payment to all procedures on the claim, click By Procedure. Alternatively, highlight specific procedures first.
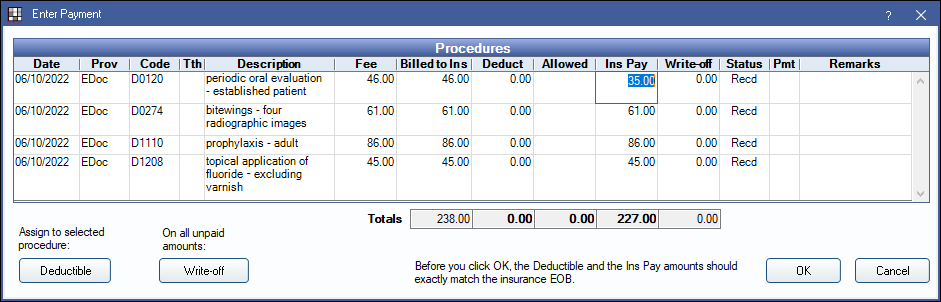
- The Enter Payment window will open.
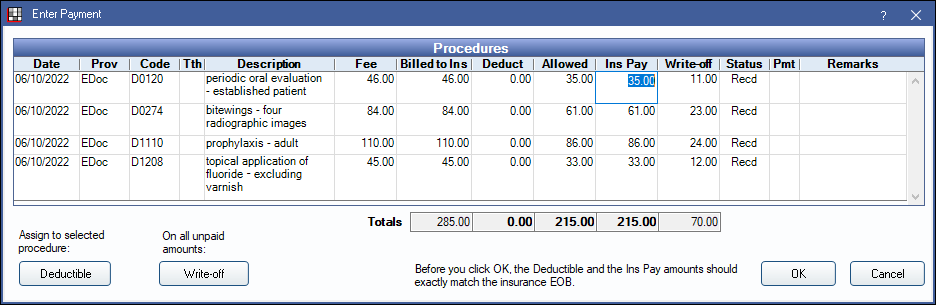
If needed, edit insurance payment information, then click OK.- Fee: Fee billed to patient.
- Billed to Ins: Fee billed to insurance.
- Deduct: Automatically calculated based on benefit information. Click in the cell to manually edit. To reassign a deductible to a different procedure, highlight the procedure, then click Deductible.
- Allowed: Entered amounts will be saved to the out-of-network fee schedule for this insurance plan and used to calculate better estimates for patients with the same carrier. Note: Out-of-network fee schedules can be automatically generated by the Blue Book. If using Blue Book, the Allow Editing Fee Schedule While Receiving Claims and Fee Schedule Edit permissions are required.
- Ins Pay: Automatically calculated based on benefit estimates. Click in the cell to edit.
- Write-off: Automatically calculated. Click in the cell to edit or click Write Off in the lower left to create a write-off for all unpaid amounts by procedure (Fee Billed - Ins Pay).
- Pat Resp: Displays patient responsibility for the procedure. Only displays when enabled in Preferences
- Pay Tracking: Click in cell to select from a list of options (defined in Definitions: Claim Payment Tracking). Useful to track why payments are rejected. Only displays when enabled in Preferences.
- Remarks: Click in the cell to enter remarks for any procedure that has a remark in the EOB.
- Double-click on Date, Prov, Code, Th, Description, Fee Billed or Status to open the Claim Procedures ( claimprocs ) and edit information.
- If not all procedures have been marked received, a popup will appear.
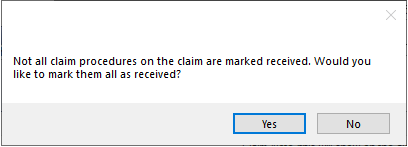
- Click Yes to mark all procedures received, changing the Claim Status to received.
- Click No to leave as unreceived procedures. This will leave the claim in a Sent - Verified status and remain on the Outstanding Insurance Claims Report.
- Payments show associated with their procedures on the Edit Claim window.

- Once complete, continue to Finalize Insurance Payment.
Claims with No Payment
If insurance does not pay on a claim, receive the procedure(s) using the As Total or By Procedure steps above. Enter 0 for each procedure. This will mark the claim as Received so it is no longer considered outstanding.
If the claim is associated with an insurance that the practice does not receive assignment of benefits for (i.e., insurance payment does not go to the practice), enable the preference Auto receive claims with no assignment of benefits. When enabled, claims will immediately be marked received with $0 payment once they have been marked as sent.
To scan an EOB associated with the zero payment, do one of the following:
- If the preference Show claims received after days is disabled, finalize the payment and add the EOB by creating a Batch Insurance Payment.
- If the preference Show claims received after days is enabled,
- and you are within the number of days entered, finalize the payment by clicking This Claim Only. Enter 0 for the payment amount, add the EOB, and finalize the payment.
- and you are outside the number of days entered, create a supplemental payment with an amount of 0. Create the payment by clicking This Claim Only. Enter 0 for the payment amount, add the EOB, and finalize the payment.
Insurance Pays on Alternate Procedure Codes
If insurance pays on different procedure codes than they were sent (e.g., A BW and Pano was filed, but insurance paid on FMX), simply add the payment to the procedures that was charted. No need to recreate the claims or procedures.
- Enter the payment by Procedure.
- Allocate the payment to the procedures that were actually completed.
- Add a note in the Remarks section.
- Finalize the payment as normal.
Preferences to Consider
The following Preferences will affect users when receiving payment for an insurance claim:
- Disallow write-offs greater then the adjusted procedure fee: When enabled, users will be prevented from entering write-offs that exceed the adjusted procedure fee. The following warning appears when users enter write-offs that are too high:
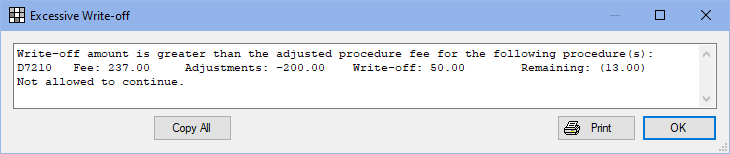
- Users must click OK to return to the Enter Payment window and the correct write-off amount before continuing to receive the claim.
- Initial primary insurance payment and write-off cannot exceed adjusted procedure fee: When enabled, users will be prevented from entering primary insurance payments and write-offs that total higher than the adjusted procedure fee. The following warning will appear if payments are entered that exceed the adjusted procedure fee:
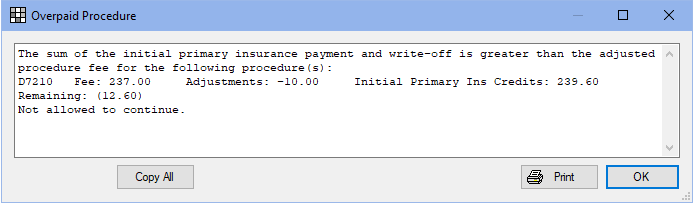
- Users must click OK to return to the Enter Payment window and correct the payment or write-off amount before continuing to receive the claim.