

Batch Insurance Payment
In the Manage Module, click Batch Ins.

This window is for entering a large batch of claims on a single EOB. For a smaller batch or single claim, see Finalize Insurance Payment
Large batch insurance payment entry is useful when there are many claims on a single EOB or when multiple users enter payments at the same time. There are two different ways to enter large batch payments.
- In the Manage Module, Batch Ins, create the payment, then receive and attach claims.
- In the Account Module, receive the claims (see Receive Claim). Then in the Manage Module click Batch Ins to create the payment and attach the claims.
Supplemental payment amounts can only be received in the Account module. See Supplemental Insurance Payments. Once received, it can be attached to a batch payment.
Create the Payment and Attach Claims
Payments already entered are listed. If a payment has only been partially entered, an X shows in the Partial column. Simply double-click a payment to continue. If the EOB has been scanned, an X shows in the Scanned column.
To filter the list of payments, select criteria at the top, then click Refresh.
- From/To Date: Filter by payment date. The default range is the last 10 days.
- Clinic: If using Clinics, filter by clinic attached to payment.
- Payment Group: Filter by claim payment group.
Click Add to create a new payment. 
Enter the payment information.
- Clinic: Select the clinic.
- Payment Type: Customize options in Definitions: Insurance Payment Types.
- Payment Group: Typically used to group payments when multiple people are entering payments at once. Customize options in Definitions: Claim Payment Groups.
- Payment Date: Defaults to today's date.
- Issue Date: Optional.
- Amount: The total amount of the payment.
- Check# and Bank-Branch: Optional, but useful for reporting.
- Carrier Name: Click Pick to select from the Carriers, or type a name.
- Note: A general note.
- Virtual Credit Card Payment: Click a button to process payments via a virtual credit card. When the transaction is complete, the Edit Insurance Payment window will still be open and transaction details will show in the Note.
Click OK to save details and proceed.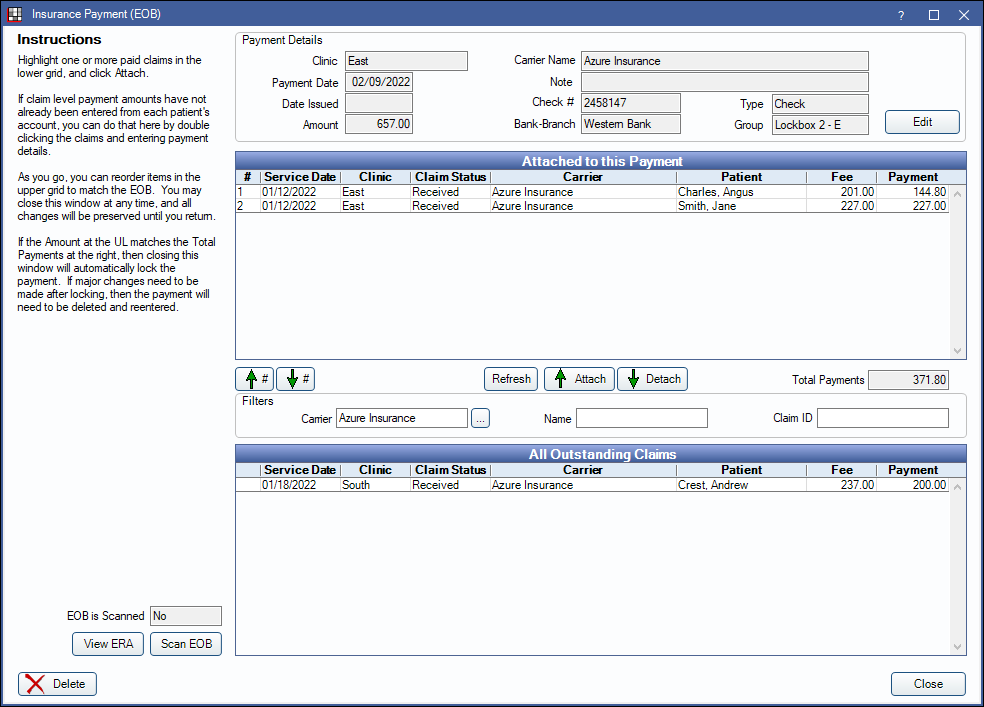
Payment Details: Information entered on the previous window. Click Edit to change.
All Outstanding Claims: All claims with a sent status or unfinalized payment for the insurance carrier.
- Claims are sorted first by carrier, then by patient.
- Claims that haven't been received will have a payment of 0. If there is a payment amount, the claim has been received but not attached to a payment.
- Carrier: Filter outstanding claim by a different carrier. Enter the name in the Carrier field. If you think you are missing a claim, search for a similar carrier (e.g. if BCBS, search for Blue Cross or similar), or click (...) to pick from a list.
- Name: Filter outstanding claims by patient name. Enter either the patient's first or last name in the Name field.
- ClaimID: Filter the outstanding claims by ClaimID. If known, enter the claimID.
If needed, attach claims that haven't been received:
- Double-click on the claim to open the Edit Claim window.
- Receive the claim By Procedure or As Total amount.
- Enter payment amounts. Click OK.
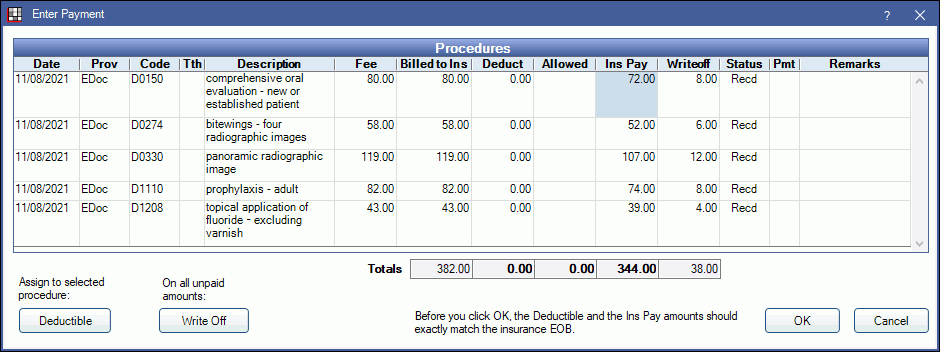
- Click OK on the Edit Claim window. The claim will automatically move to the Attached to this Payment grid and the Total Payment amount will auto-calculate.
If a claim is already received, simply highlight the claim, then click Attach.
- Right-click, then click Go To to quickly jump to the Account Module with that specific claim highlighted.
- To sort claims in the Attached to this Payment grid (e.g in the order of the EOB), click the Up/Down arrows on the far left. By default claims are sorted in the order the claims were entered.
- Click Attach/Detach to add or remove claims from the Attached to this Payment grid.
Click Scan EOB to upload an EOB. If an EOB has already been uploaded the button will show View EOB. See Scan EOB.
When the correct claims are attached, and the payment Amount and Total Payments match, click Close.
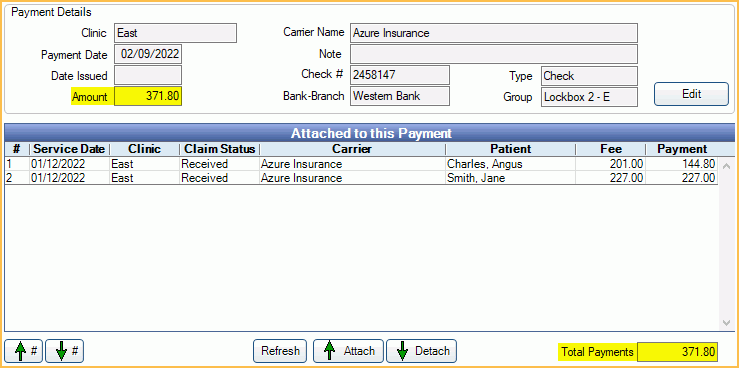
If payment amounts don't match, then clicking Close marks the batch payment as partial. Simply double-click a partial batch payment to continue. When payment amounts match, clicking Close locks the payment. To make changes, users must delete the batch payment and re-enter.
Batch insurance payments can be accessed from the Batch Insurance window, or viewed by claim via the Account module (Edit Claim window).
Correct a Batch Payment
- In the Manage Module, click Batch Ins.
- Find the check to edit, and double-click to open it.
- Click Edit in the upper right.
- Change the amount of the check by a penny and click OK. This will cause a mismatch between the paid amounts and check amount. When prompted, click OK to continue.
- Re-open the payment. Claims can now be detached and edited as needed.
- Once claims have been edited, reattach them to the payment.
- Edit the payment amount so the check total matches the paid amounts.
- Close the check to finalize again.
Questions & Answers
What if I cannot enter (receive) all of the claims that make up my bulk check/payments and I need to leave for the day?
Do not finalize the payment until you finish receiving all the claims. This way all claim payments will have the same payment date.
We have multiple people entering payments. How can we make sure the payments balance?
Assign payment groups to each payment. This will group payments together. Then run the Daily Payments Report by payment group.