

NewCrop eRx EPCS Setup
EPCS Setup must be completed by providers prior to creating prescriptions for controlled substances in the NewCrop eRx / Prescription interface.
This process is required by the Drug Enforcement Agency (DEA) to register and prescribe scheduled drugs. There may also be additional steps required by a prescriber's state.
General Setup Steps
- The prescribing provider (prescriber) must download the Authy app on their mobile device.
- Enable NewCrop eRx and complete Identity Proofing (IDP) if the prescriber has not already done so.
- Obtain an EPCS License for each provider who will prescribe controlled substances.
- Enter identity proofing credentials.
We recommend updating to the current stable version.
Subscribe for EPCS
All providers who want to prescribe controlled substances must obtain an EPCS license.
The prescriber must be logged in to Royal dental Software for the following steps (in Royal dental Software the provider must be associated to a user. See User Edit).
- In the Chart Module, click eRx to open the NewCrop eRx interface.
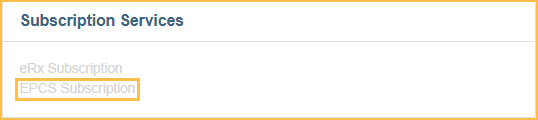
- Click the Admin tab.
- Click EPCS Subscription.
- Check the box next to the provider(s) to register for EPCS Subscriber Licenses, then click Pay Now.
- Select one the option to Subscribe for Automatic Renewal or Make One-Time Payment.
- Enter credit card and billing information.
- Click Pay.
- Close NewCrop eRx and reopen before proceeding with the next steps.
- Click Admin in the NewCrop eRX toolbar.
- Select EPCS Registration in the EPCS User Controls section (bottom left).
- Enter the address currently listed on the prescriber's driver's license and current email address. Before clicking save, verify the DEA number is correct.
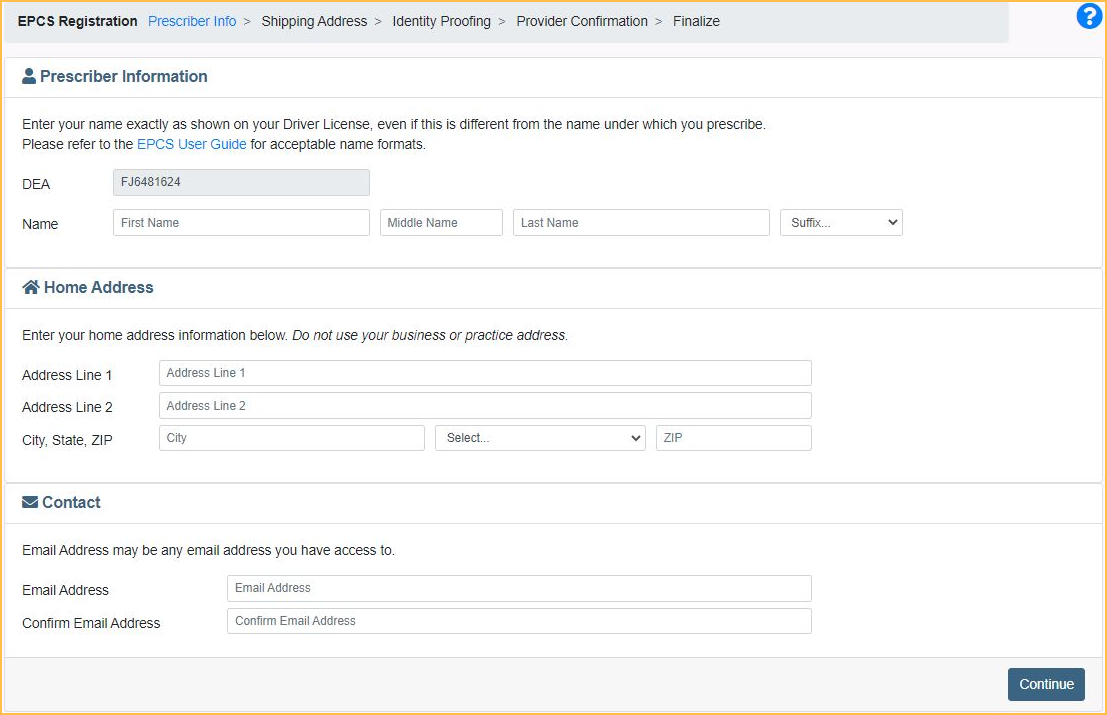
- Click Continue.
- Prescribers will receive a hardware token as part of their registration. The hardware token is a physical device that generates a One-Time Passcode (OTP). Prescribers can choose to have the hardware token shipped to the location (practice/clinic) address or home address. Click the preferred shipping address, verify it is correct, and click Order Token.
- Click Begin to begin identity proofing with Exostar. Click each button only once. Some buttons may respond slowly.
- Review the Subscriber Agreement. Click I Agree.
- Confirm profile: Select United States from the dropdown and click Submit.
- The prescriber enter their personal information. Review carefully. Once information is verified as correct, click I Agree.
- The prescriber will be presented with questions that will be used to verify their identity. Read all questions carefully. When all questions are answered, click Next. If the prescriber cannot be approved during the registration process, they will be provided with one of the two alternative methods below:
- Webcam proofing
- US mail
- Once identity proofing is complete, proceed to Two-Factor Authentication (TFA) Setup.
Two-Factor Authentication (TFA) setup
To set up TFA using the hardware token and the Authy app:
- The hardware token will arrive in approximately one business week. If the hardware token has not yet arrived, click Skip to Next to set up the Authy app.
- To bind the Authy app to prescriber's profile, the prescriber will enter their phone number and email address.
- Click Register Phone. If the prescriber has not yet downloaded the app, they will receive a text message with a link to the downloaded app.
- Open the Authy app and follow the on-screen instructions.
- In the NewCrop eRx window, continue to next steps.
- Click the red X and enter the 6-digit passcode from the Authy app into the Soft OTP field.
- Click Submit.
- The prescriber will see confirmation that the app is now bound to their profile. Click Complete.


Exostar Profile Access
For the prescriber to access their Exostar profile, they must authenticate using one of the TFA methods or via a text message or voice call. It is important that the prescriber sets up text messaging or voice call in the event that they do not have access to their TFA method and would like to add a new TFA method. If they are unable to access their profile, the current profile will be revoked and the prescriber is required to re-start the entire process.
- Enter the prescriber's cell phone number to receive a text in order to authenticate to their profile. Select the Country, enter and verify the phone number to text. Click Send Code.
- If the prescriber would prefer to have a voice call, change the first drop down to voice call. Enter and verify the phone number to call.
- Click Call.
- Enter the Verification Code that was sent. Click Submit. Once the prescriber's profile is set up, they can add more than one authentication number to their profile.
- Click Complete.
The prescriber has now completed the Exostar registration process. The prescriber can manage the TFA devices in the Admin Tab, EPCS Device Management link. Once the process is completed in Exostar, there are two last steps must be completed. These steps are called the Grant and Finalize steps.
Grant and Finalize
Assign a Practice Administrator: The DEA requires an EPCS Administrator to confirm the identity of the Prescriber. This is called the Grant Step. Anyone on the list who is not the Prescriber can complete the Grant Step as the EPCS Administrator.
- In the NewCrop eRX window, click Admin in the top toolbar.
- Click Assign Account Administrators in the EPCS Administration area.
- Select the checkbox by the name(s) of the user to assign as administrators. Selected users cannot be the prescriber currently signing up for EPCS.
- Click Select.
- The prescriber closes all NewCrop eRx windows and log offs of Royal dental Software.

Granting EPCS Access: The user selected as EPCS administrator (admin) in the previous steps must log into Royal dental Software to complete the following steps.
- Click eRx in Chart to launch NewCrop eRx.
- Click Admin in the top toolbar.
- Click Grant/Revoke Prescriber in the EPCS Administration area.
- Check the box left of the prescriber's name.
- Click Grant.
- The admin will get a message stating "Success! Prescriber has been granted EPCS rights. They will need to login to finalize their Registration."
- The admin closes all NewCrop eRx windows and logs off of Royal dental Software.
Finalizing EPCS: The prescriber must log into Royal dental Software to complete the following steps.
- Click eRx in Chart to launch NewCrop eRx.
- Click Admin in the top toolbar.
- Click the EPCS Registration link in the EPCS User Controls area.
- The prescriber will be prompted to set a 4-digit PIN number. Enter a code and click Save. This is the PIN the prescriber will use any time they prescribe a controlled substance.
- Select an option for Token or Authy App to receive a one-time code.
- Enter the code from the selected method.
- Click Submit.
- If registration has completed successfully, the prescriber will receive the following message: "EPCS Registration Complete! Congratulations! You have completed your EPCS Registration with Exostar. Please contact your EHR support for any issues prescribing Controlled Substances."
- Contact Royal dental Software Support to finish enabling EPCS access.
Bind Hardware Token
For the following steps, the prescriber must be logged in to Royal dental Software. The prescriber will receive a hardware token in the mail.
- Click eRx in Chart to launch NewCrop eRx.
- Click Admin in the top toolbar.
- Click EPCS Device Management.
- Click Authenticate to receive an authentication code by text/call or through the Authy app.
- In the Soft OTP field, enter the code received in the previous step.
- Click Add Token.
- Enter the serial number found on the back of the hardware token.
- Click the button on the hardware token to generate One-Time Password 1, and enter it in the field. Click the button again to generate One-Time Password 2, and enter it.
- Click Submit.
