

Email Templates
In Email Message Edit, on the left, is the Email Template area.
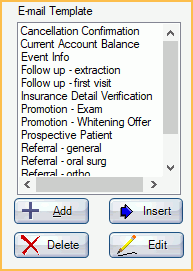
Templates can be used for frequently sent email messages that have similar content.
Templates are listed alphabetically.
- Add: Click to add a new template.
- Delete: Highlight a template, then click to delete it.
- Insert: Highlight a template, then click to insert it into the email body. The template's subject and message will replace any existing text.
- Edit: Highlight a template, then click to edit it.
Add or Edit Email Templates
Click Add to create a new template, or click Edit to edit an existing template. 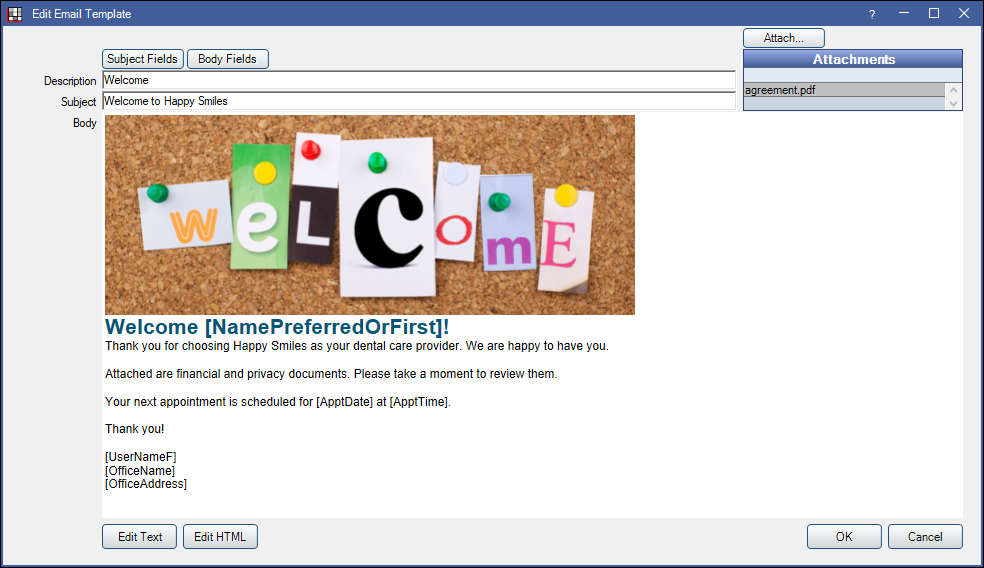
- Description: Enter the template name. It can differ from the email subject.
- Subject: Enter the subject of the email.
- Body: Enter the body message.
- Attach: Click to attach images or files to the template. Select the file, then click Open. Attachments will list in the box.
- Double-click an attachment to preview it.
- Right-click an attachment to open, rename, or remove it.
- Microsoft account users cannot send attachments that include file names with invalid characters. Invalid characters include spaces and the following: ; , ( ) [ ] { } % $ + ! * = & ? @ # ~ ' " " < > ` ^
- Edit Text: Used to edit text in body after HTML template has been applied to email.
- Edit HTML: Add HTML formatting to email template. See HTML Email for details on use, including the option to edit Raw HTML to further customize templates.
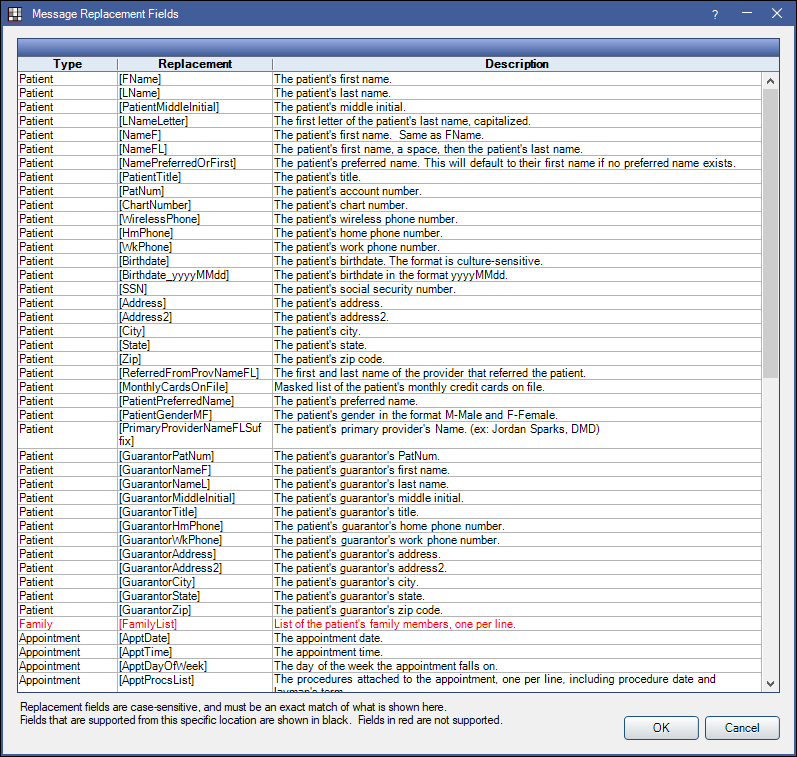
- Subject Fields / Body Fields: Insert replacement fields into the Subject or Body. Message replacement fields pull information from the database to insert into the message (e.g. insert [ApptDate] to automatically insert appointment date).
You may also manually type the replacement (e.g. [LName]), but make sure it exactly matches the field name. They are case-sensitive.
Position the cursor to where you want to insert a field, then double-click an item from the list. Fields in red text cannot be inserted.
Click OK to save the template.