

Wiki Edit
Add and edit wiki pages to meet the needs of the practice.
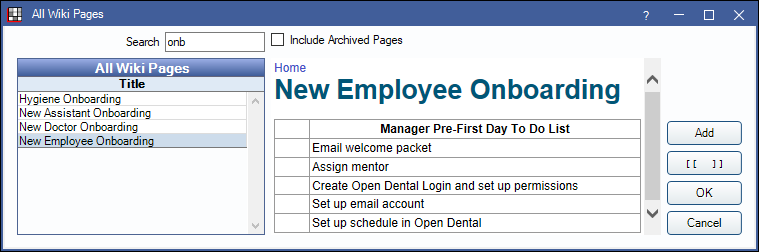
In the Wiki, click Edit.

Create a New Page
There are several options to create a Wiki page.
Option 1: Toolbar
- In the toolbar, click +Add.
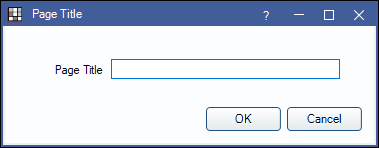
- Enter the Page Title and click OK. Text entered will determine the Page Name and the Page Title (heading 1).
Option 2: Using Brackets
- On any existing page, click Edit.
- Type [[Example Wiki Title]] where you would like the link to appear.
- Click Save, then Yes to create the new Wiki page.
Option 2: Existing Page
- On any existing page, click Edit.
- Click Int Link.
 Note: To link to an archived wiki page, check Include Archived Pages. Archived pages are prepended with (Archived).
 - Click Add.
- Enter the page title and click OK to create a new wiki page and link to it in the existing page.
Edit a Wiki Page
- Open the page you want to edit.
- Click Edit in the toolbar.
- Enter the changes in the editing area on the left. Changes will show in real time as they will appear on the right.
- Click Save or Save as Draft.
Wiki Toolbar
This toolbar appears across the top of the page when you create or edit a page.
- Save: Saves changes and closes the edit window.
- Save as Draft: Save a draft version of the page without altering the original. Wiki page edits are also automatically saved as drafts when Royal dental Software is force closed, such as during an update, as long as there are no code validation errors.
- Cancel: Close the window without saving changes.
- Int Link: Add a link to another wiki page.
- Bookmark: Add a bookmark to the top of a long wiki page to jump to a specified section of that page.
- Open the wiki page, click Edit.
- Scroll to the section you want to bookmark.
- Click Bookmark. Enter an ID and a Display Text. These do not have to match.
- Click OK.
- Cut the <a href="#displaytext"></a> code and paste it where you want the link to appear, typically at the top of the page.
- The <div id="ID"></div> code marks where the bookmark will jump to.
- Click Save.
- File: Add a link to a file on the network.
- Folder: Add a link to a folder on the network.
- Ext Link: Add a link to an external website (enter the full URL path: http://www.mysite.com).
- Heading 1, 2, 3: Format text as Page Title (h1), Subtitle (h2) or smaller category (h3). Properties of all <h> tags can be customized in the embedded stylesheet.
- Table: (See below)
- Image: Click to add an image to the wiki page. Images must exist in the A to Z folders. (See below).
- Lock: Lock wiki page so that edits can only be made by users with Wiki Admin permission.
- Undo: Undo the previous action. Only able to undo one action.
- Italic: Italicize specific words or multiple lines at once.
- Color: Make the selected text red. Change the color by replacing the color name in the Markup, for example: color:blue. Not usable on links.
- Font: Change the font of the selected text. The default font family is courier. To change, edit the font name in the Markup (e.g. font:courier.) Other examples: times, serif, arial, etc.
Formatting & Keywords
Keywords: Add keywords to a page using the following pattern: [[keywords: office, tasks, workflow, employee, end of day, closing tasks]] Keywords can be inserted anywhere in the wiki.
Bulleted Lists: Use asterisks * without a space after them. A line without an asterisk ends the list. Sub-bullets are not supported.
- *first item
- *second item
- *last item
Numbered Lists: Use hashes # without a space after them. A line without a hash ends the list. Sub-bullets are not supported.
- #first item in list
- #second item
- #last item
Special Characters: < and >. These characted must be prefixed with an ampersand (&). Example: &> or &<
Images: To place an image in the Wiki, save it in the A-Z Folders in the Wiki subfolder. If an image doesn't exist, the page cannot be saved.
- To import a file to this list, click Import and select the file.
- Double-click on the image name in the Wiki list.
Tables
Table markup cannot be edited directly in the page. Instead users must use the Table interface. Borders are always 1, cellspacing 0, cellpadding 0. Carriage returns are allowed inside cells. There is no control over shading or colors.
If having difficulty editing a large cell, users may wish to select all cell text (Ctrl+A), copy (Ctrl+C), paste (Ctrl+V) and edit in another software and paste back into the cell.
Click Table to insert a table at cursor. Add or delete columns and rows on the right side of the screen.
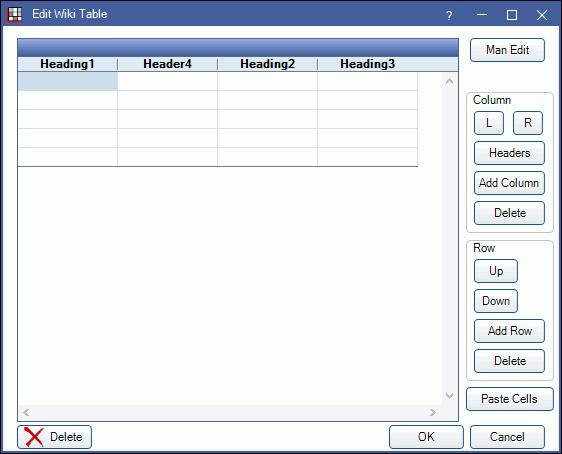
Man Edit: Manually edit table Markup.
Column: Select buttons to edit columns.
- L: Select a cell and click to move the cell to the left one column.
- R: Select a cell and click to move the cell to the right one column.
- Headers: Click to edit the column headers. Users can modify column header name and column size.
- Add Column: Click to create a new column to the right of the currently selected cell.
- Delete: Click to remove the currently selected column and any text in the contained cells.
Row: Select buttons to edit rows.
- Up: Select a cell and click to move the cell up one row.
- Down: Select a cell and click to move the cell down one row.
- Add Row: Click to add a new row below the currently selected row.
Paste Cells: Click to paste data from another table. To copy data from an external table to a wiki table, users must be running Google Chrome. If it is a complex table, users may need to copy/paste in pieces. First, copy the external table cells. Then click Table, make sure there are enough columns, then click Paste Cells.
To bold the text within a cell, edit the text outside of the Table window.