Schedule Setup
Schedule setup allows users to view and enter all provider and employee schedules.
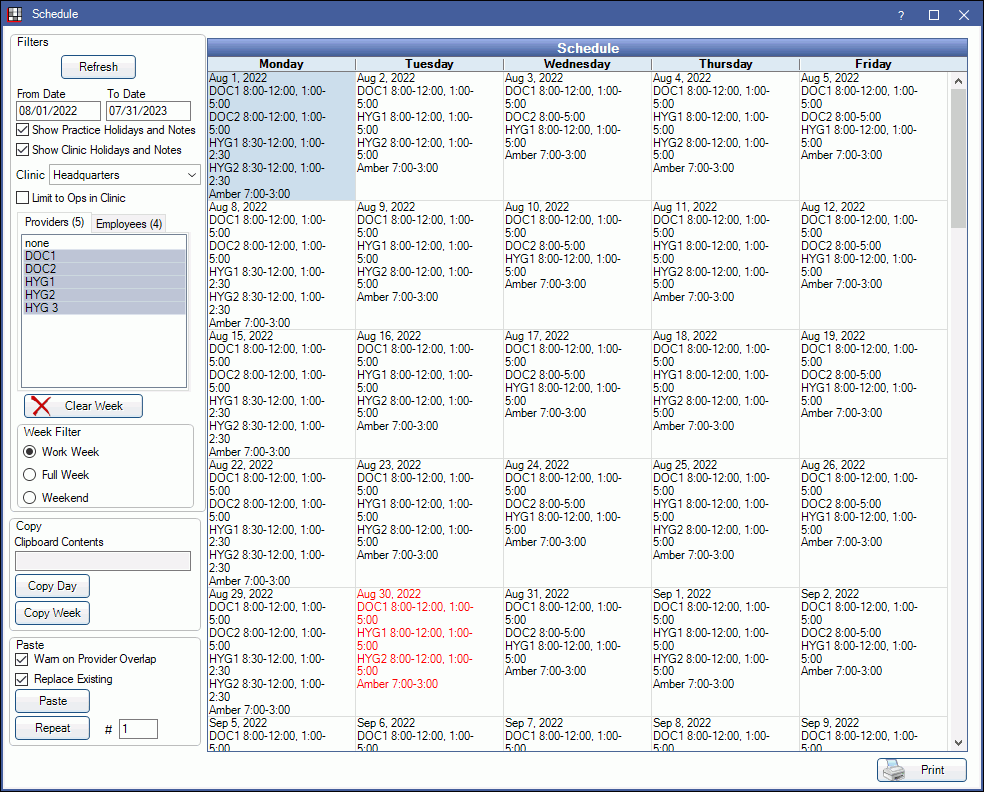
To view the schedule, in the Main Menu, click Setup, Schedules.

Alternatively, in the Manage Module, select a specific employee(s). Click View Schedule.
![]() See our videos: Operatory and Schedule Setup & Operatory and Schedule Setup for Clinics
See our videos: Operatory and Schedule Setup & Operatory and Schedule Setup for Clinics
About
Offices can define any kind of rotating or alternating schedule they want. From the Schedule window, enter individual work hours, holidays, lunch hours, and staff meetings.
To edit schedules, the Schedules - Practice and Provider security permission is required. The schedule may be blank until a provider or employee is selected and refresh is clicked.
Once schedules are entered, open/closed hours will be indicated in the Appointments Module with the background colors set in Definitions: Appointment Colors.
Schedule Grid
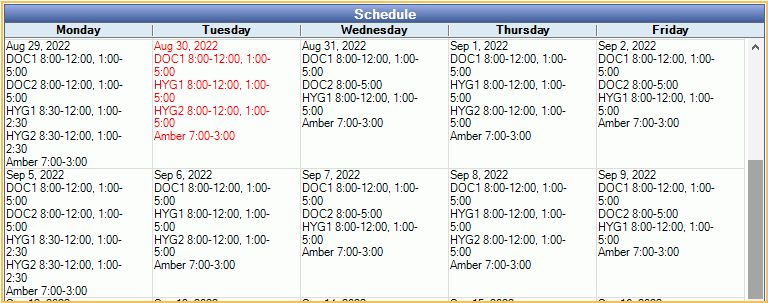
Each day is represented by one cell. Today's date and schedule shows in red text.

Double-click a day to open the Schedule Edit. Add employees or provider time to the schedule, or change the schedule for one day.
Filters
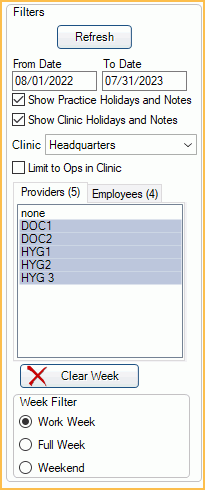
The filter options on the left control what shows in each cell.

- Refresh: Make changes to filters, then click to refresh the Schedule Grid.
- From/To Dates: The date range currently displayed on the window.
- Show Practice Holidays and Notes: Show practice notes and holidays entered via the Edit Day window.
- Show Clinic Holidays and Notes: Only displays when Clinics is enabled. Show the selected clinic's holidays and notes entered via the Edit Day window.
- Clinic: Only displays when Clinics is enabled. Select a clinic and only its scheduled providers will show. The default clinic is the one selected in the Main Menu. Users must have access to a clinic to view its schedule. Initially the schedule will only show dates, notes, or holidays. Select providers and employees to populate the schedule with provider and employee names and hours.
- Limit to Ops in Clinic: Only displays when Clinics is enabled. Check the box to filter to operatories with the selected clinic and view the scheduled time blocks. While in this view, all buttons in the lower left are disabled and schedules can't be edited.
- Providers() / Employees (): View providers or employees. When using Clinics, only displays providers or employees associated with the selected clinic.
- When the Preference, Select all provider/employees when loading schedules, is enabled, all providers and employees will be selected when the Schedule window is opened. If the preference is disabled, no employees or providers will be selected when the Schedule window is opened; employees or providers must be selected manually to view schedules.
- Double-click a provider or employee to show their schedule only. Click and drag to select multiple providers/employees, or ctrl-click to choose multiple, then click Refresh to view schedules. The number currently selected appears in parentheses.
- Clear Week: Delete all schedule entries for the selected providers and employees, for the selected week.
- To clear multiple weeks, users can also go to a blank week, copy it, then repeat it. Make sure the Replace Existing box is checked (for example repeat it for 20 weeks to clear 20 weeks.)
- Week Filter: Choose what days of the weeks are currently displayed on the schedule.
- Work Week: Display only weekdays (Monday - Friday)
- Full Week: Display entire week (Monday - Sunday)
- Weekend: Display only weekends (Saturday and Sunday)
Copy / Paste Schedule
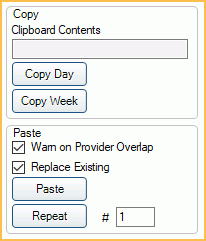
Use the Copy / Paste areas to quickly create or edit the schedule.

Copy: Copy a day or week's schedule to the clipboard. This is a useful tool (with Paste/Repeat below) to quickly fill the schedule.
- Copy Day: Copy the selected day only.
- Copy Week: Copy the entire week based on the selected day.
Paste: Paste the copied day or week's schedule to a new day or week. Or repeatedly copy it for a specific number of days or weeks into the future.
- Warn on Provider Overlap: Receive a warning when provider schedules overlap in assigned operatories when a user clicks Paste or Repeat. Checked by default.
- Replace Existing: Check this box to overwrite any existing schedules when a user clicks Paste or Repeat.
- Paste: Paste the copied day or week to the selected day or week.
- Repeat: Paste the copied day or week repeatedly for a specific number of days or weeks. Enter the number of days or weeks next to #.
- When using Clinics, the schedule for all Clinics is copied regardless of the Clinic selected in Filters.
- When pasting over an existing schedule, a warning will popup indicating the number of providers whose schedule will be replaced.
- Days marked as a holiday will not be replaced when pasting a schedule. To enter a schedule onto these days, do so manually.
- See the Examples section of Schedule Edit for further instruction on setting up various schedules.
Print Schedule
Print: Print the schedule for the selected date range.


