Host your own Patient Portal
Patient Portal can be hosted by the practice if preferred.
Note: Royal dental Software does not provide support on self-hosted setup. We recommend you work with an IT professional.
The self-hosted web service validates that the customer is on active support at start up and does not validate the registration key again until the web service is restarted.
Self-Hosted Setup
- Update to the most current stable version of Royal dental Software.
- Purchase and install a certificate from any certificate authority. Existing certificates can be reused if needed.
- Configure the RoyalDentalWebConfig.xml file.
- Change the router settings and forward port 443 (https) to the computer where IIS is installed.
- Allow all incoming traffic on port 443 through any applicable Firewalls.
- Set up an IIS web service pointing to the Royal dental Software folder:
- Open the IIS Manager and right click on Default Web Site, then click Add Application.
- Set Alias to RoyalDental.
- Set Physical Path to the folder where Royal dental Software is installed.
- Click OK.
- Set up the Patient Portal URL in the eServices Patient Portal window. Only needs done once.
- Allow Patient Portal Access for each patient as needed.
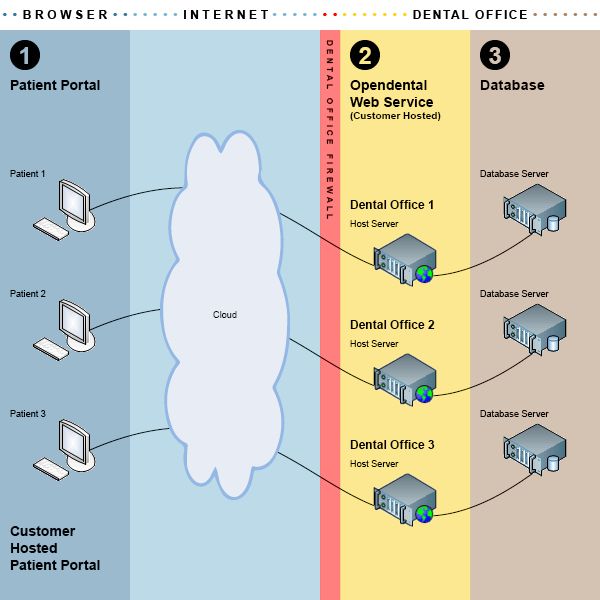
Self-Hosted Patient Portal Diagram