Edit Claim - Status History Tab
Use the Status History tab to record data about a claim.
In the Claim Edit window, click the Status History tab.

The Status History tab is useful to track a claim status, such as why a claim hasn't been sent, why processing is delayed, etc.
Before you can add a status, you must first create and customize definitions.
- Customize claim custom tracking status options in Definitions: Claim Custom Tracking
- Customize Error Codes in Definitions: Claim Error Code.
- Optionally, force a status to be used by checking Exclude 'None' as an option on Custom Claim Tracking Status in Preferences.
- To update status for many claims at once, see Outstanding Insurance Claims Report.
This information does not show on printed claims or e-claims.
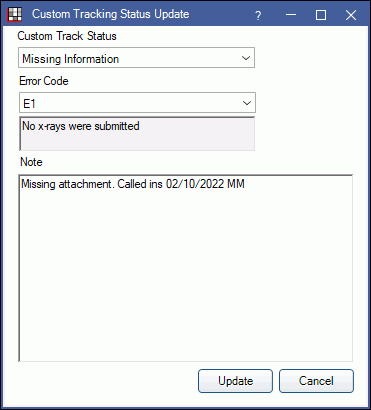
Add a Custom Track Status / Error Code
- Click Add.

- Custom Track Status: Click the dropdown to select a status. No status will be selected by default. Users must select a status.
- Error Code: Click the dropdown to select an error code. The long description of the error code displays in the text box below the dropdown. Note: To require an error code, enable Require error code when adding claim custom tracking status in Preferences.
- Note: Optionally add a note that will show in the Log Note column. Right-click to insert Quick Paste Notes. Notes can be added or edited later by double-clicking on claim tracking status.
- Click Update to save.
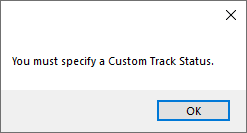
- If no Custom Track Status was selected the below message will appear. Click OK to return to the prior window and choose a Custom Track Status. Users cannot proceed without selecting a Custom Track Status.
- If None was selected as the Custom Track Status, the below message will appear. Click OK to proceed with None as the Custom Track Status. Click Cancel to return to the prior window and choose a different Custom Track Status.


